Compute
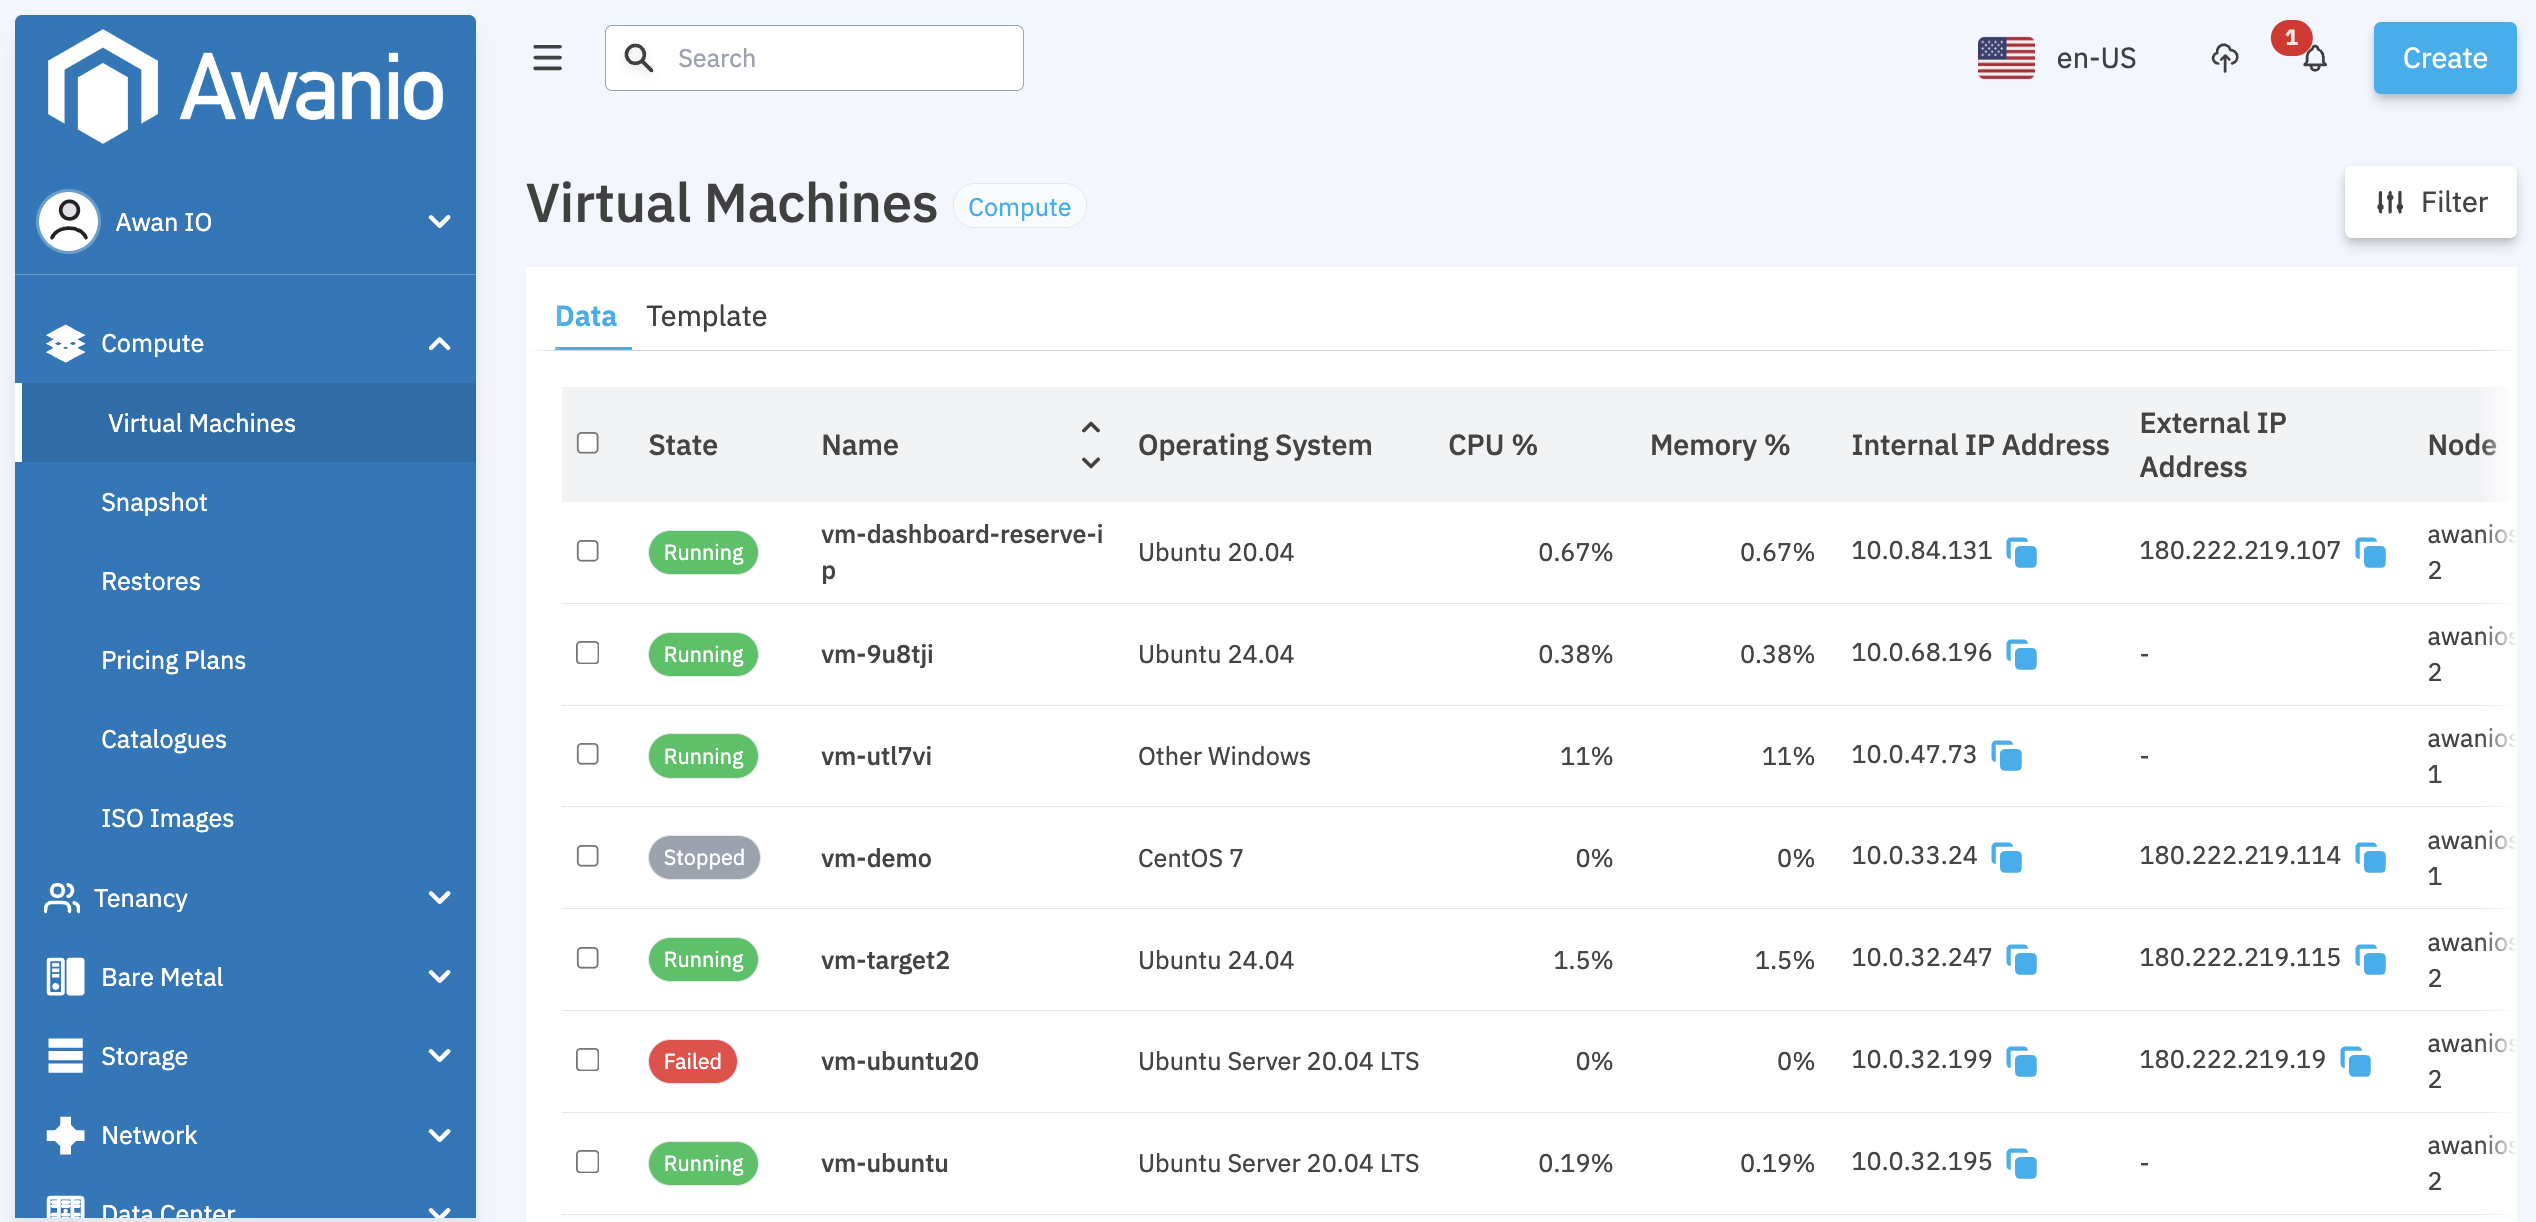
This page provides an overview of Compute features provided by Awanio.
Introduction
A virtual machine (VM) is the virtualization/emulation of a computer system. It allows a business to run an operating system that behaves like a completely separate computer in an app window on a desktop.
Awanio compute service is provided as Virtual Machine, with add-on storage, security and monitoring capabilities.

Before the VM is ready for subscriptions, you have to set pricing for compute service, additional volume/storage and public IP address.
After some configuration is done from the Dashboard, customers can create VMs from the Platform and customize from there.
To configure applications on your instances, connect to the instance using Secure Shell (SSH) for Linux instances or Remote Desktop Protocol (RDP) for Windows Server instances.
Pricing Plans
Awanio offers a range of virtual machine plans to meet diverse computing needs. These plans vary in terms of computing resources such as CPU, RAM, and storage.
Administrators can customize and manage VM plans by adjusting resource allocations and pricing. This ensures flexibility in meeting user demands and adapting to changing resource requirements.
The total cost of a VM in a month depends on the number of hours the VM is used until the end of the month. Every 1st of the following month, an invoice will be issued containing detailed calculations of VM usage and other resources.
VM cost per hour is the total of 3 price components for processor (vCPU), memory (RAM) and storage. If a VM is stopped (turned off), the user will still be charged a partial fee for storage usage.
Creating your VMs
When creating a VM, you can choose the machine properties of your VMs, such as the number of virtual CPUs and the amount of memory, by using a set of predefined plans or by creating your own custom specification.
VM instances can run the images that we provide as well as custom images that you can create or import from your existing systems.
By default, each VM has a small boot disk that contains the operating system. When applications running on your instance require more storage space, you can add additional volume to your instance.
Managing access to your VMs
You can manage access to your instances using one of the following methods:
- Linux instances:
- Managing instance access using OS login, which allows you to access your instance with username and password.
- Manage your SSH keys in your account, which uses public SSH keys that will be stored in VM metadata to grant access to the VM.
- Windows Server instances:
- Generate credentials for Windows VMs, which associates a password with a Windows user. Windows VMs use this information to authenticate access to the VM.
Each network interface of a VM instance is associated with a subnet of a unique VPC network. You can create separate subnets to group your instances.
A public IP address is available so you can access your instances with SSH/RDP over the internet.
Accessing your VMs
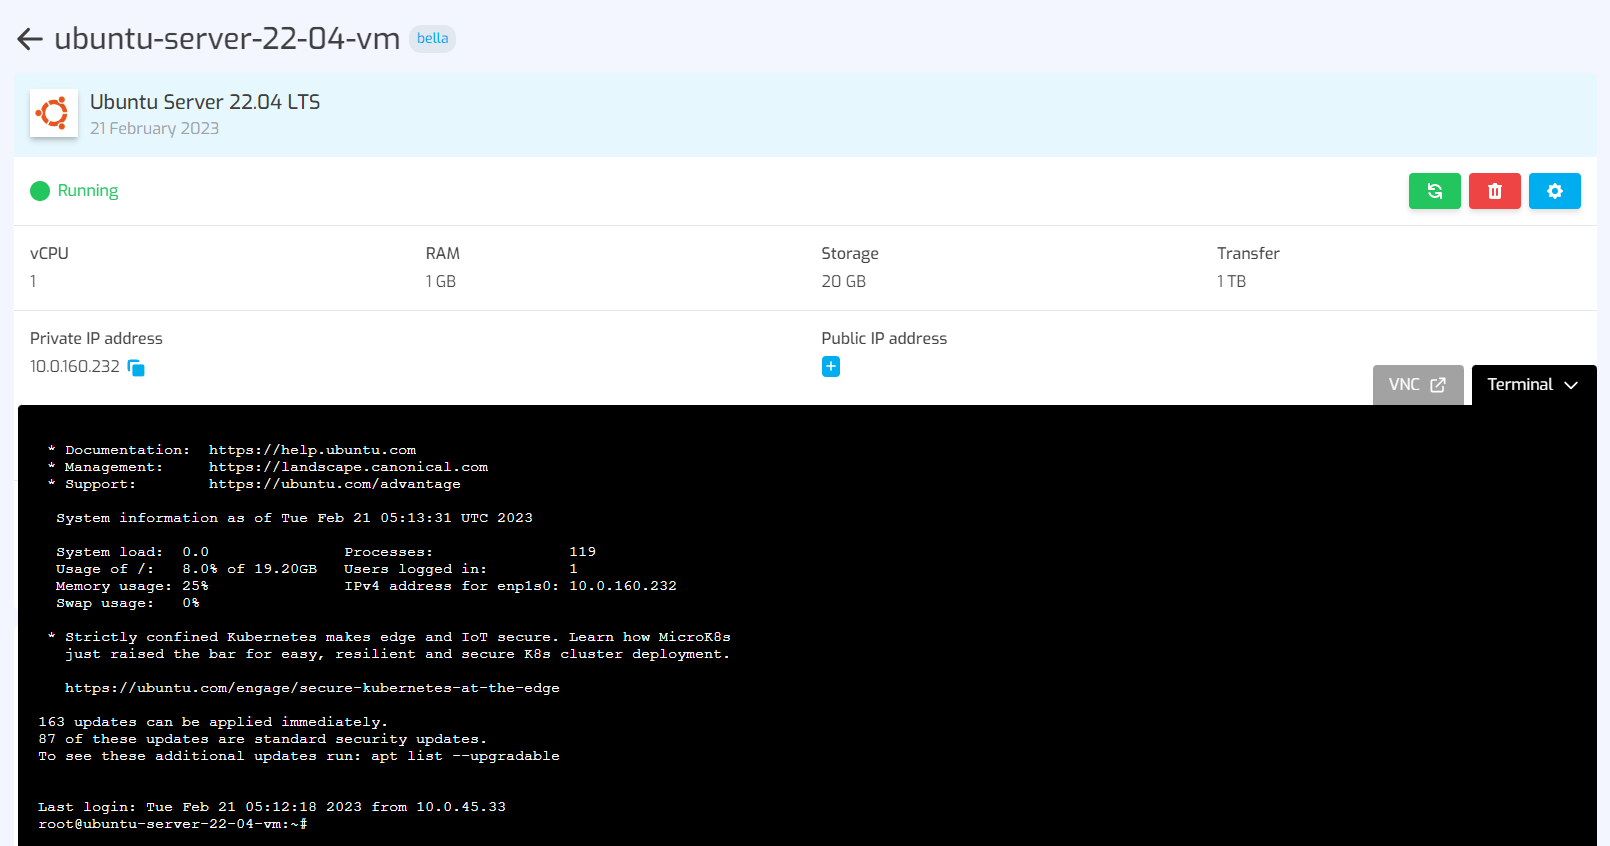
On the VM details page, you can monitor VM status and usage, and also manage VM through our web terminal, on one page. VNC Client is also available and it will be opened in a new tab.
For VM instances that have public IP addresses, you can also connect to your instances via SSH connection for Linux VM or RDP for Windows VM.

Monitoring your VMs
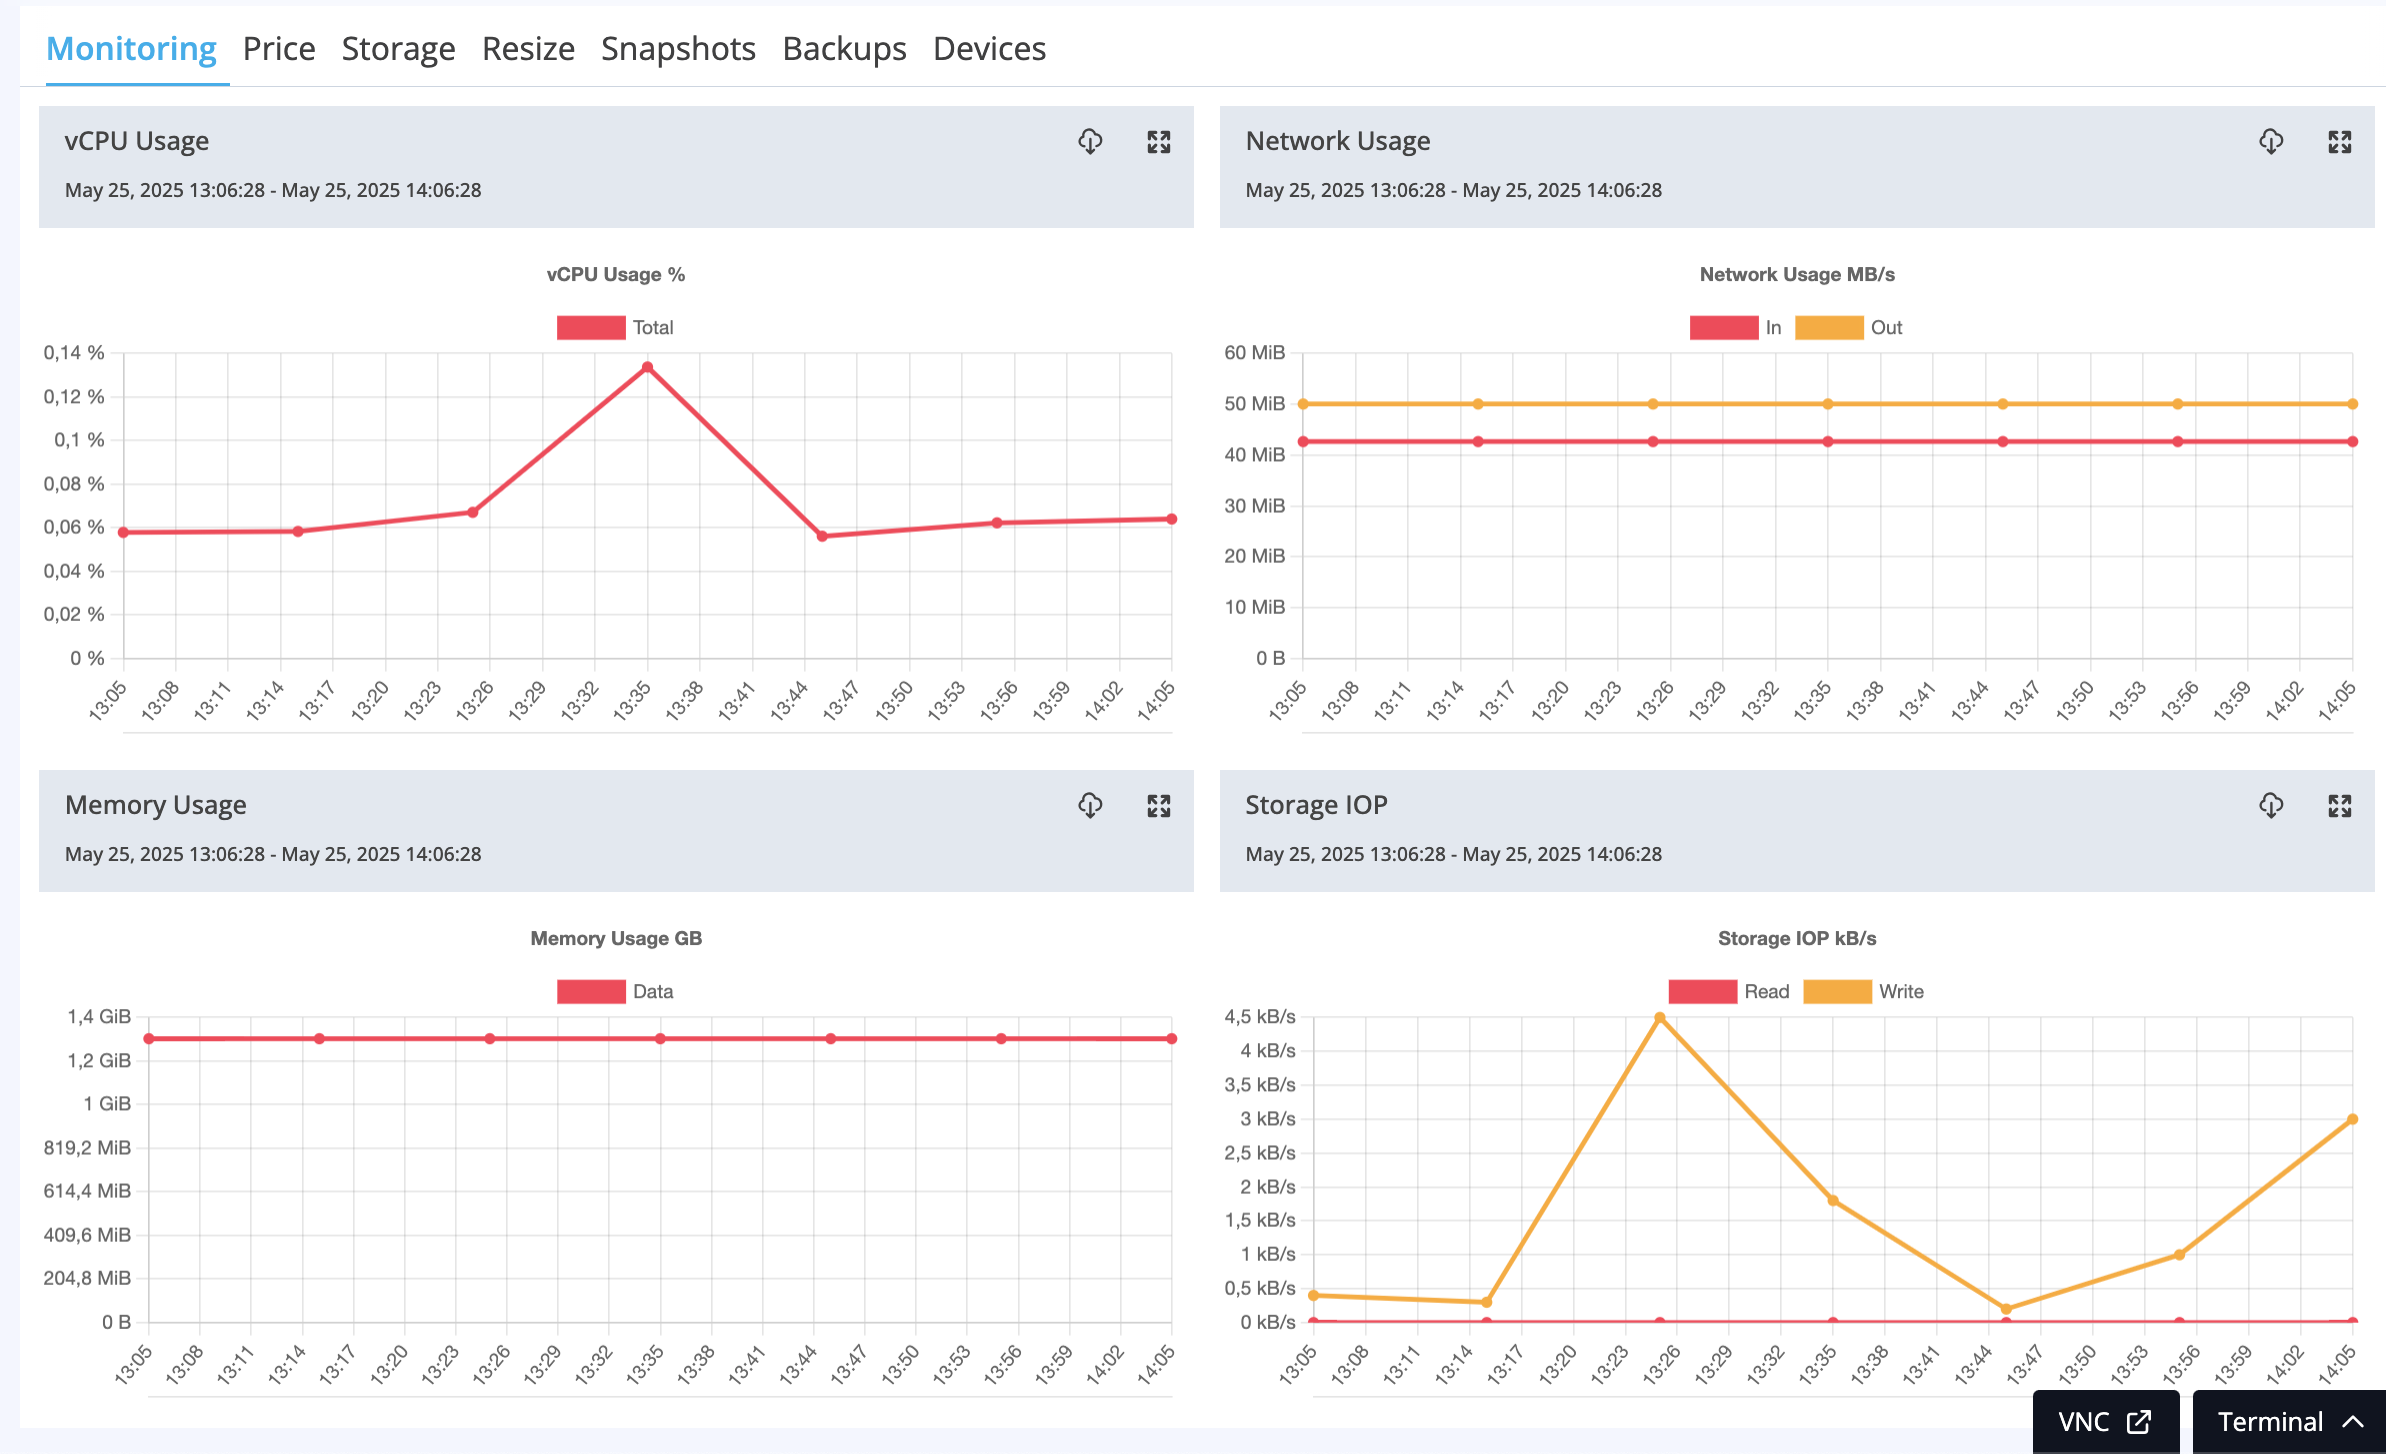
Monitoring graph is available for VM condition in the last 1 hour:
- Processor usage
- Network usage
- Memory usage
- Storage IOPs

Resizing your VMs
Resize is the ability to change the size of a virtual machine, allowing it to upscale or downscale according to a user’s needs. This feature is available on the VM details page.
Only the memory or the CPU size of virtual machines can be upscaled and downscaled, disk size can only be upscaled. For virtual machines with attached volumes, the volumes are not affected during the resizing process.
After you increase the size of a VM boot disk, you must use file system–specific commands to extend the file system to the new, larger size. You can do this as soon as you have resized the VM on the detail page. You can check this page to do it.
Note
Some OS require restart when changing vCPU and RAM size, please check the following list.
OS Upsize CPU Upsize Memory Downsize CPU Downsize Memory Centos 7, 8 and 8 Stream No restart Manual restart Restart by system Restart by system Centos 9 Stream No restart No restart Restart by system Restart by system Almalinux No restart Manual restart Restart by system Restart by system Ubuntu 20.04 and ubuntu 22.04 Must running manual script:
1. Open terminal
2. lscpu and find section Off-line CPU(s) list
3. Make online cpu with commmad ‘chcpu -e [cpu number]’. Example chcpu -e 1-3Manual restart Restart by system Restart by system Ubuntu 24.04 No restart No restart Restart by system Restart by system Debian 11 and Debian 12 Must running manual script:
1. Open terminal
2. lscpu and find section Off-line CPU(s) list
3. Make online cpu with commmad ‘chcpu -e [cpu number]’. Example chcpu -e 1-3 Restart by system Restart by system Restart by system RHEL 7 and 8 No restart Manual restart Restart by system Restart by system RHEL 9 No restart No restart Restart by system Restart by system Rocky 8 No restart Manual restart Restart by system Restart by system Rocky 9 No restart No restart Restart by system Restart by system Windows Restart by system Restart by system Restart by system Restart by system The resize feature complies with the policy for allowed VM sizes. You can resize a VM only to sizes that are allowed or not greater than the resource quota of the organization.
VM Snapshots
A snapshot allows for a complete copy of a virtual machine at a point in time to be created for backup purposes. Snapshots can be used to help prepare your environment for recovery. You can create a snapshot of the virtual machine in Awanio. Snapshots can be created on a schedule, or immediately. The snapshot creation schedule can be set hourly, daily, or weekly.
Backup VM to Object Storage
In addition to snapshots, Awanio also has a VM backup feature that is saved to object storage, either object storage within the cluster or outside the Awanio cluster. Backups can be made on a scheduled basis per hour, per day or per week.
Attach and Detach Public IP Address
This allows users to attach/detach a public IP address to an existing VM. If you created a VM without a public IP address, you can attach the public IP address afterward. To do so, you must first reserve a public IP address. Then on the VM details page, the Public IP address section. Click the + button, and then select an IP address from the list of the reserved IP addresses. When the VM already has a public IP address and you want to detach it, click the x button next to the public IP address. A dialog will appear to confirm your action.
VM Live Migration
Awanio allows you to move (migrate) a running VM between different physical machines in a manner that the VM and applications running within the VM are mostly unaffected. Memory, storage, and network connectivity of the virtual machine are transferred from the original host machine to the destination.
Clone VM
VM cloning can be performed and produce up to 5 VMs with the same configuration in one process.
Export VM
You can export a VM in Awanio as an image in .img format or a compressed file in .gzip format for lighter weight, and use the image for purposes outside of Awanio.
You can export a VM while the VM is stopped. If you want to keep the VM running, you can take a snapshot and then restore the snapshot data to a disk. The disk can then be exported as an image.
Default time zone for VM instances
The default time for your VM is Coordinated Universal Time (UTC).
Supported Guest OS
Awanio support a wide range of guest operating systems, including recent versions of Windows (Server and Desktop), Linux (such as Ubuntu, RHEL, CentOS, and Debian), etc.
| Group | Operating System |
| AlmaLinux | AlmaLinux 8 |
| AlmaLinux | AlmaLinux 9 |
| Alpine | Alpine Linux |
| Arch | Arch Linux |
| CentOS | CentOS 7 |
| CentOS | CentOS Stream 8 |
| CentOS | CentOS Stream 9 |
| Debian | Debian 7 |
| Debian | Debian 8 |
| Debian | Debian 9 |
| Debian | Debian 10 |
| Debian | Debian 11 |
| Debian | Debian 12 |
| Fedora | Fedora |
| FreeBSD | FreeBSD |
| OpenBSD | OpenBSD |
| Oracle Linux | Oracle Linux |
| openSUSE | openSUSE |
| openSUSE | openSUSE Leap 15.0 |
| openSUSE | openSUSE Tumbleweed |
| SUSE | SUSE Linux Enterprise |
| RedHat | Red Hat Enterprise Linux |
| RedHat | Red Hat Enterprise Linux 6 |
| RedHat | Red Hat Enterprise Linux 7 |
| RedHat | Red Hat Enterprise Linux 8 |
| RedHat | Red Hat Enterprise Linux 9 |
| Rocky Linux | Rocky Linux 8 |
| Rocky Linux | Rocky Linux 9 |
| Solaris | Solaris 9 |
| Solaris | Solaris 10 |
| Solaris | Oracle Solaris 11 |
| Ubuntu | Ubuntu 18.04 |
| Ubuntu | Ubuntu 18.10 |
| Ubuntu | Ubuntu 19.04 |
| Ubuntu | Ubuntu 19.10 |
| Ubuntu | Ubuntu 20.04 |
| Ubuntu | Ubuntu 20.10 |
| Ubuntu | Ubuntu 21.04 |
| Ubuntu | Ubuntu 21.10 |
| Ubuntu | Ubuntu 22.04 |
| Ubuntu | Ubuntu 22.10 |
| Ubuntu | Ubuntu 23.04 |
| Ubuntu | Ubuntu 23.10 |
| Ubuntu | Ubuntu 24.04 |
| Windows | Microsoft Windows 7 |
| Windows | Microsoft Windows 8 |
| Windows | Microsoft Windows 8.1 |
| Windows | Microsoft Windows 10 |
| Windows | Microsoft Windows Server 2003 |
| Windows | Microsoft Windows Server 2008 |
| Windows | Microsoft Windows Server 2012 |
| Windows | Microsoft Windows Server 2016 |
| Windows | Microsoft Windows Server 2019 |
| Windows | Microsoft Windows Server 2022 |
Bandwidth Management
Bandwidth Management is a mechanism for regulating, limiting, or prioritizing network usage by virtual machines (VMs), hosts, or specific applications within a virtualization or cloud environment.
Goals
- Fairness: Distributing bandwidth so that all VMs receive a fair allocation.
- Prioritization: Ensuring the smooth operation of critical applications.
- Stability: Avoiding the “noisy neighbor problem,” which occurs when one VM interferes with the performance of another.
- Compliance & SLA: Ensuring quality of service according to contracts or internal policies.
The bandwidth management mechanism in Awanio is the setting of the Ingress Rate and Egress Rate on a VM’s network interface in Mbit/s.